Gift Card Holder
This gift card holder can be put onto any card you make, making it very versatile and quick. One sheet of 8 1/2 X 11 paper produces 3 holders. Make all three when you need one and the other two will be ready for you when you need them. You can use them on your hand made cards or even on store bought cards.Supplies:
8 1/2 X 11 piece of card stock of your choiceScoring tool
Cutting tool
Adhesive
Procedure:
Step 1
Cut an 8 1/2 X 11 piece of card stock into three 10 1/2 X 2 1/2 pieces. Set 2 aside and repeat the following procedures on them as well.
Step 2
Score a piece of 10 1/2 X 2 1/2 piece of cardstock at the 3 1/2 and 7 inch points, then turn it 90 degrees and score at 1/2 inch along the long side.

You should have 6 sections on your card stock. Three larger and three smaller, narrow sections. Cut out the two outer thin sections.

Step 4
Next you will cut the angles on the outer large sections. Line up the card stock on a cutter so that it cuts from the bottom exterior corner (where the small piece was cut out) to the top edge at the 3 1/2 inch point where the score mark is. Cut. Then line up the exterior bottom right corner (where the small piece was cut out) and the outer edge at the 7 inch mark and cut.


Step 5
Fold up the center thin bottom section.

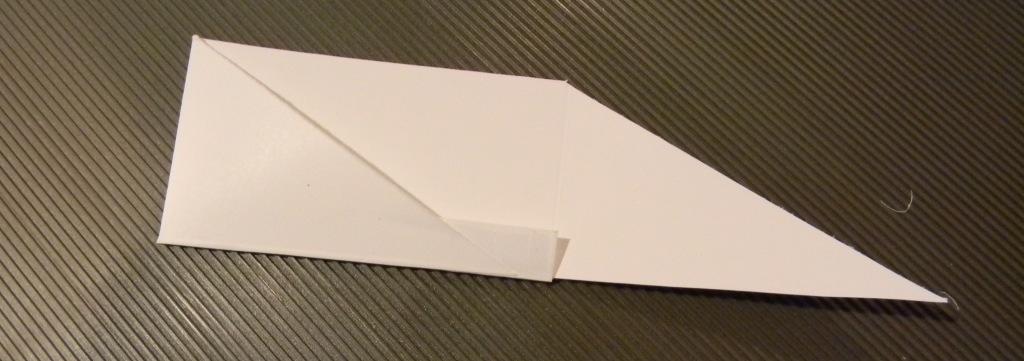
Step 6
Run a bead of glue, or use snail adhesive (what I did) along the bottom rim of the left triangle piece. Fold so that it adheres to the folded up thin piece. Do the same with the right triangle piece to finish the holder.
Step 7
Use adhesive to attach to the inside of a card.

Insert Gift Card into holder and you are ready to send the card!


This is my first attempt at a pictorial tutorial. Hopefully my picture taking skills will improve with time, but this is such a simple project that I am sure you will easily understand the steps!
I hope you enjoyed it and enjoy using the holder in the future!
No comments:
Post a Comment